Quickstart
In this quickstart, we’ll create your first VM from start to finish, using only the graphical interface via your favorite Web browser. Once you’ve received your NOVA access, you can start by creating your key pair, which will be used to connect to your VMs.
Prerequisites
- Have an active NOVA project and access to the Web interface with your PERSEUS credentials (see Connection to the Web interface).
- Have generated an SSH key pair on your machine (see SSH)
Create your key pair
After logging into the Openstack web interface, go to the left-hand tab Project > Compute > Key pairs, click on Import a public key :
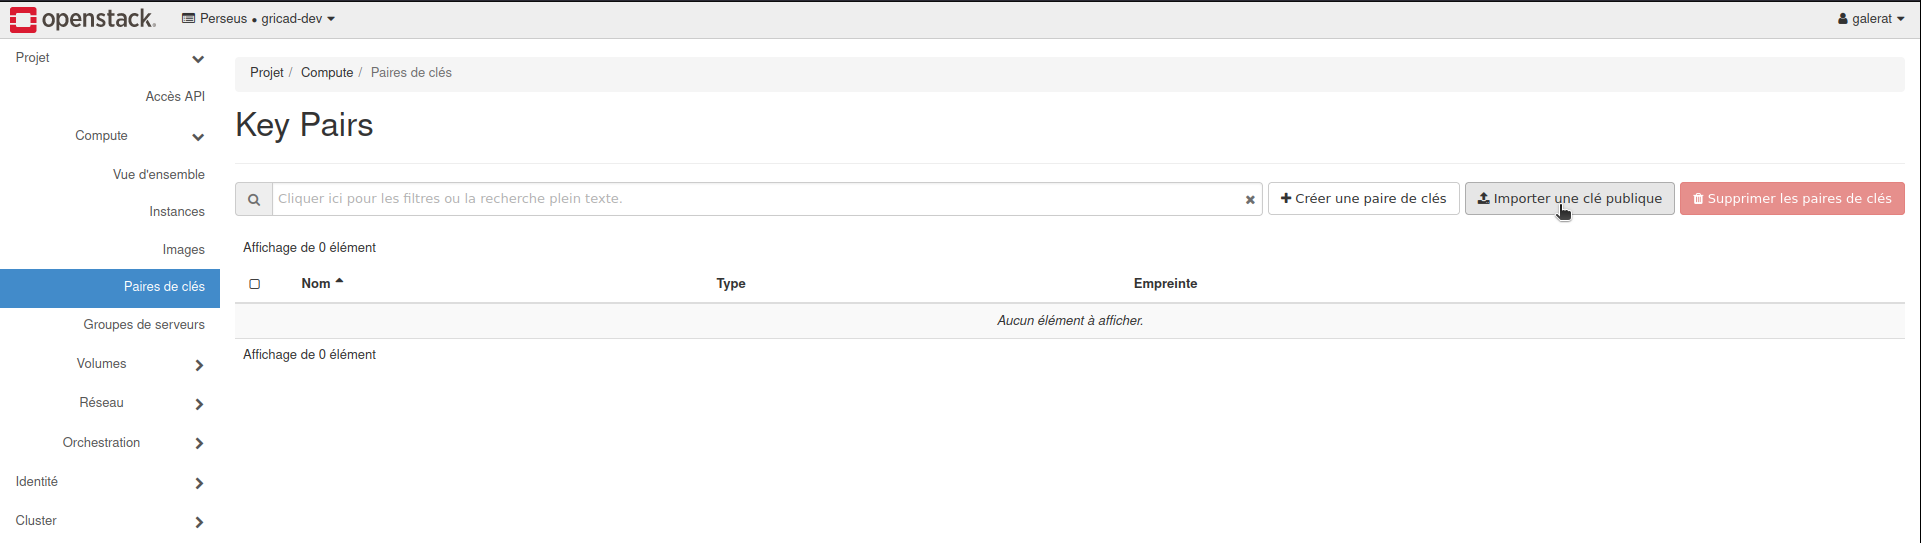
Choose a name for your key. Choose SSH key for the Key type. Finally, you can choose between :
- Select the file corresponding to your public key, i.e. the file generated during prerequisites and ending in .pub, e.g. id_rsa.pub.
- Copy and paste the contents of the file corresponding to your public key.
Reminder: by default, this file is located in the ~/.ssh folder.
Authorize SSH access
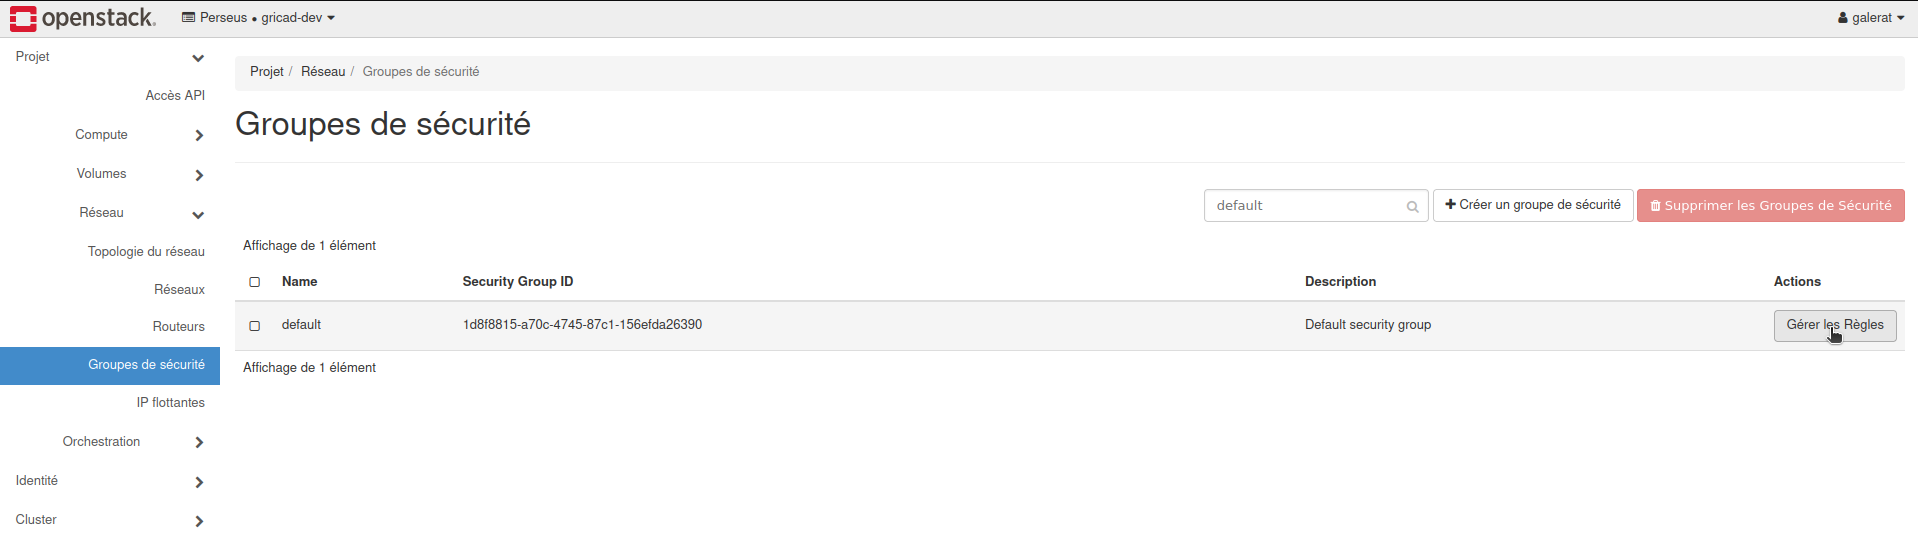
We now need to authorize SSH requests from the outside. To do this, go to the left-hand tab Project > Network > Security Groups, click on Manage Rules :
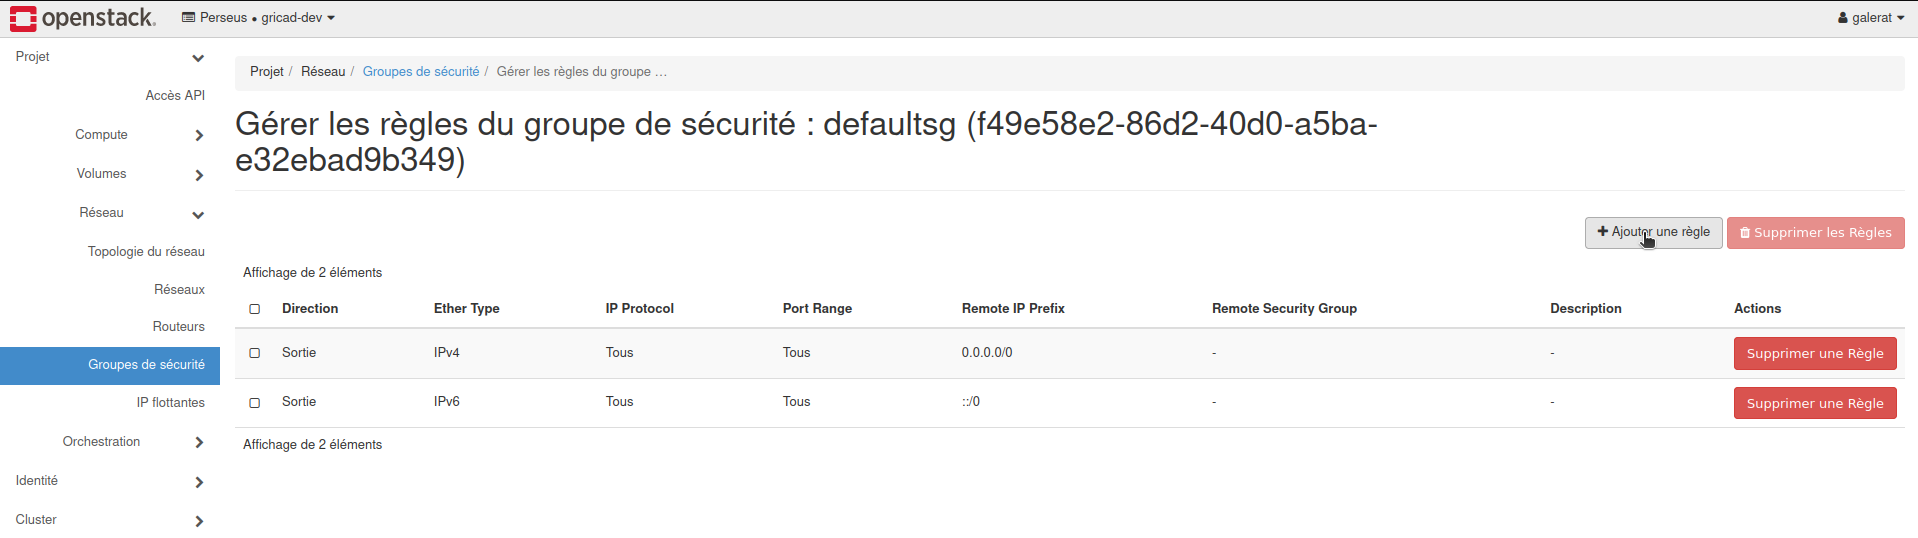
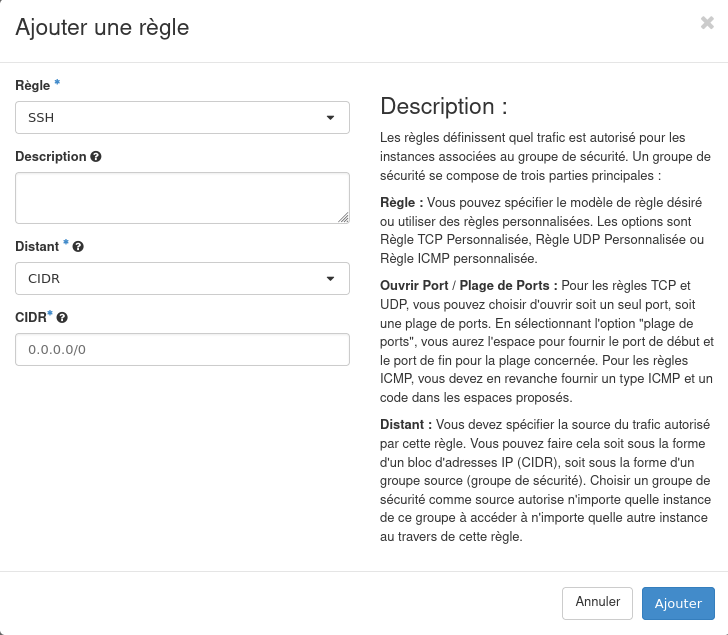
Then click on Add a rule :
For Rule, choose SSH :
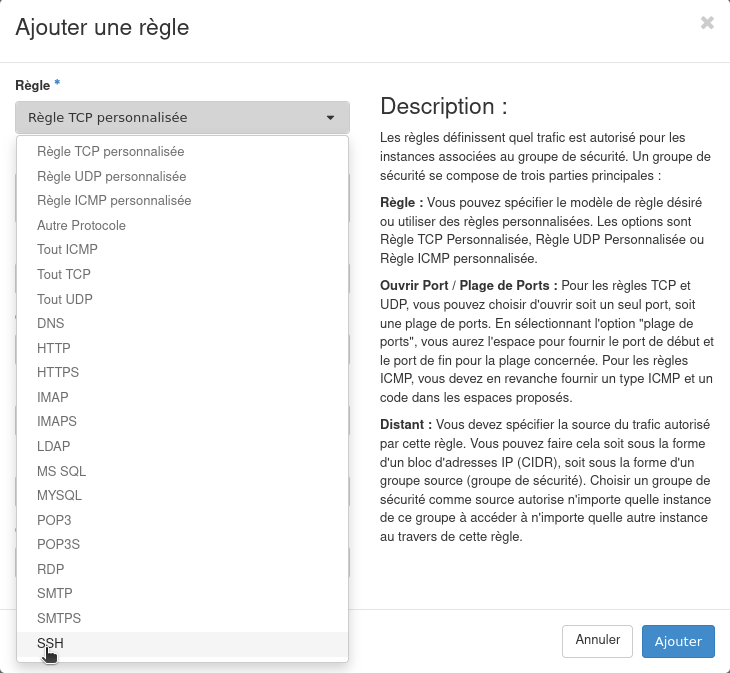
Next, you need to choose the source of the SSH that will be authorized. You can leave the default values CIDR and 0.0.0.0/0, which correspond to everyone. Warning, later on, for security reasons, it’s best to replace the 0.0.0.0/0 with your IP address, so that only you can access your VM.
Create your instance
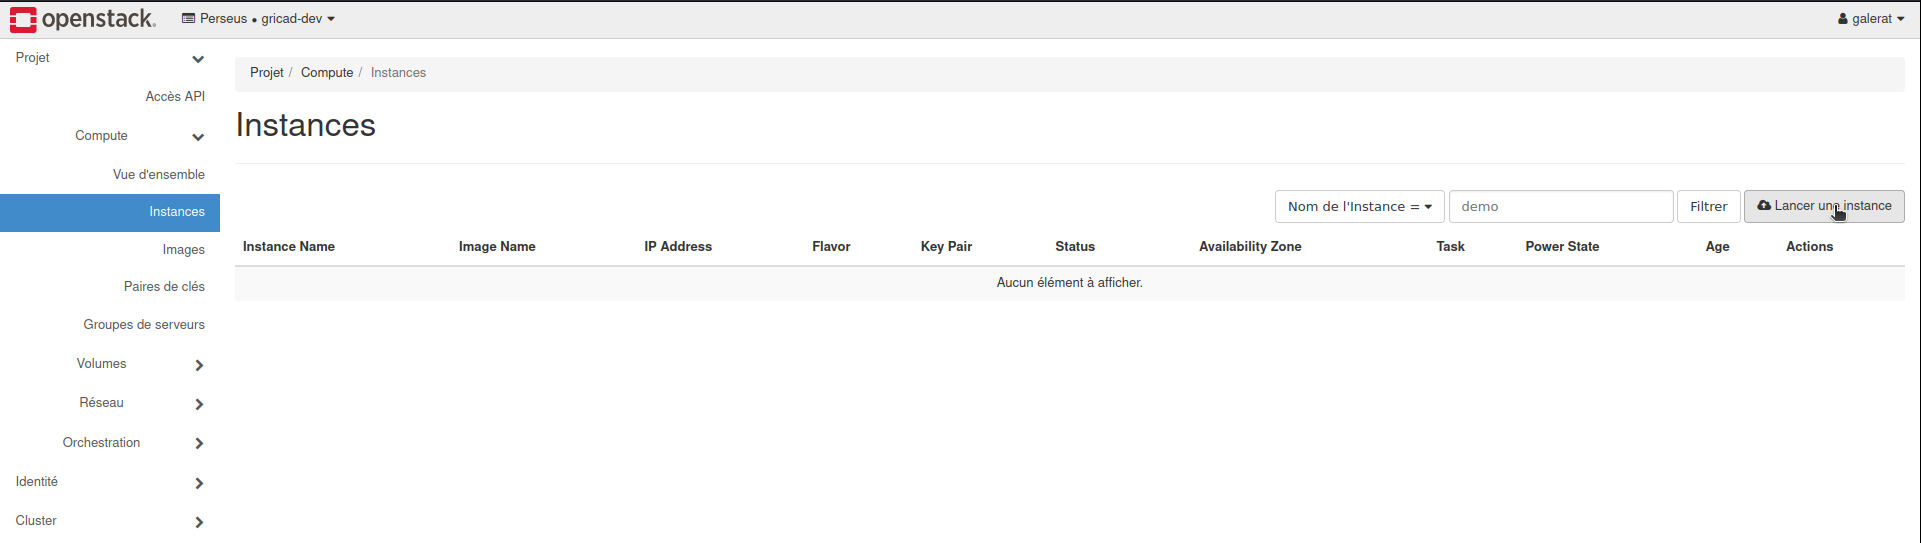
We can now move on to the most important step: creating an instance, the name given to a VM by Openstack. To do this, go to the left-hand tab Project > Compute > Instances, click on Launch an instance :
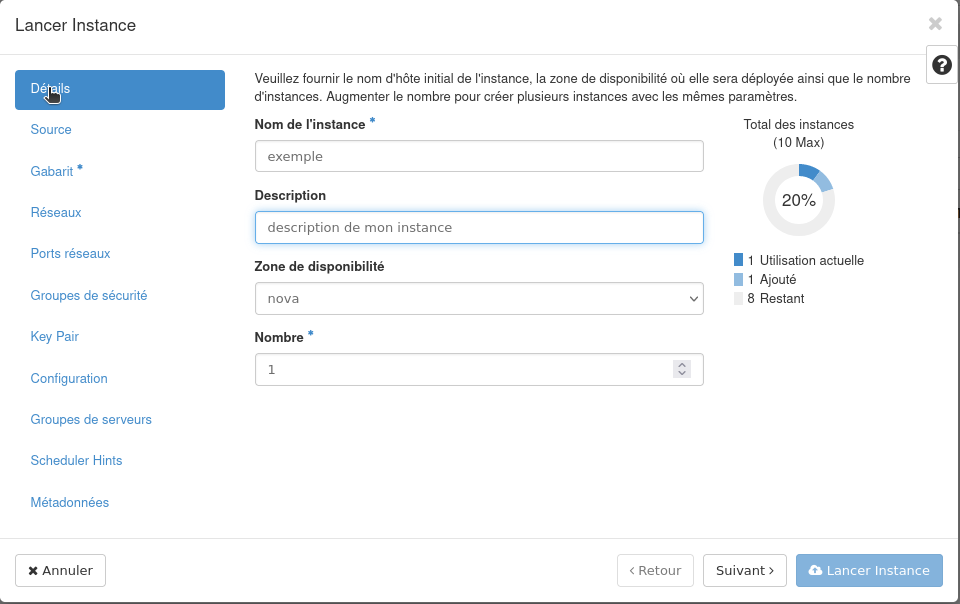
- In the Details tab
- Choose a name for your instance. You can also add a description.
- For the rest, leave the default values.
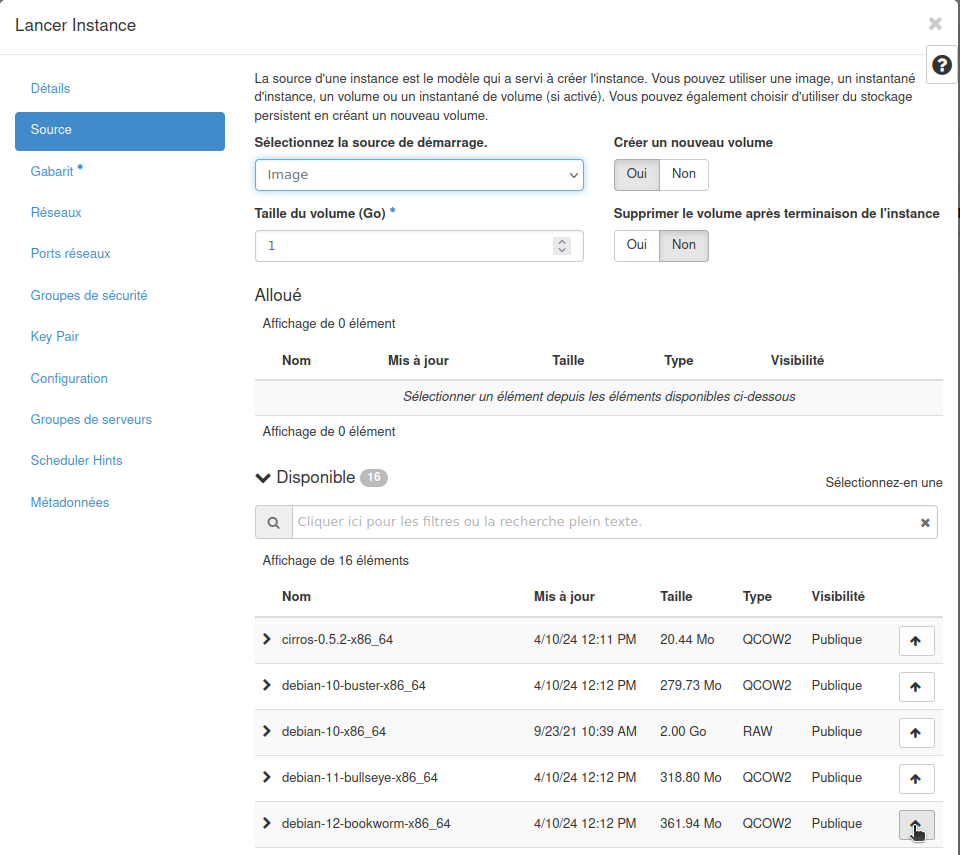
- In the Source tab
- Choose the operating system you want, in the version you want, for example debian-12-bookworm-x86_64.
- You can increase the size of the volume created if you wish. The default size is 20 GB. In any case, it will be possible to add an additional volume to this instance after it has been created, just like connecting a hard disk to a physical machine.
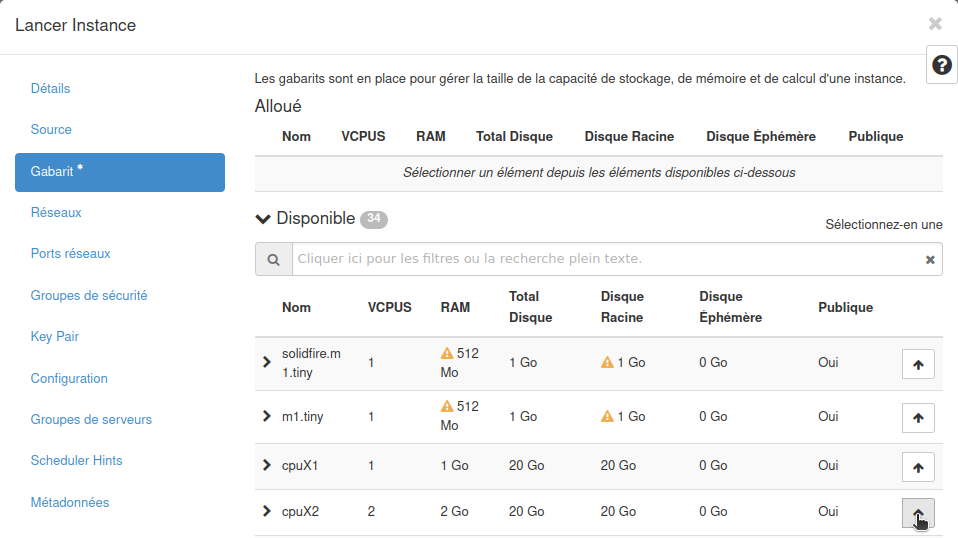
- In the Gabarit tab
- Select the resources you wish to allocate to your instance: CPUs, RAM and disk space.
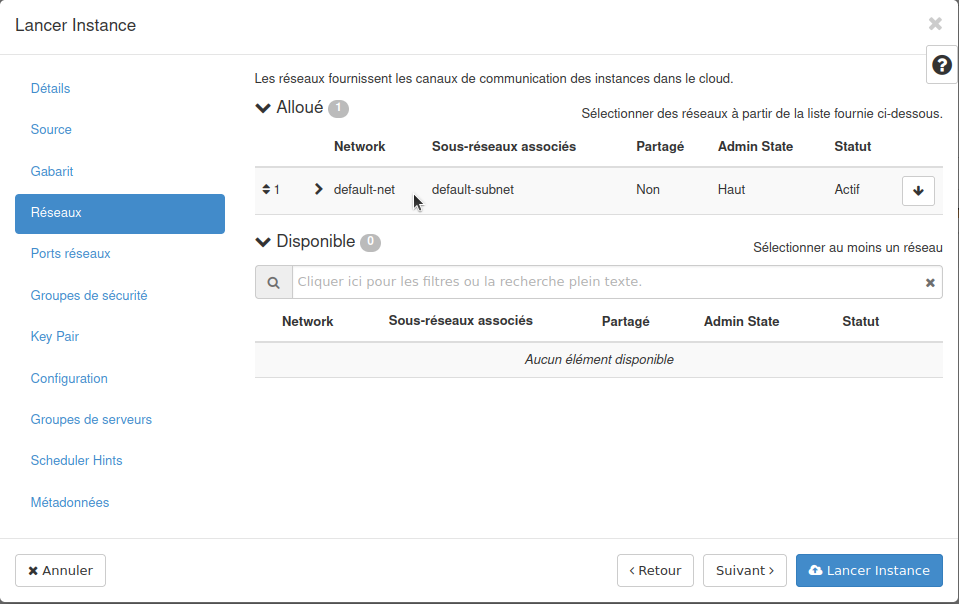
- In the Networks tab
- The default network default-net is normally already selected. If not, select it.
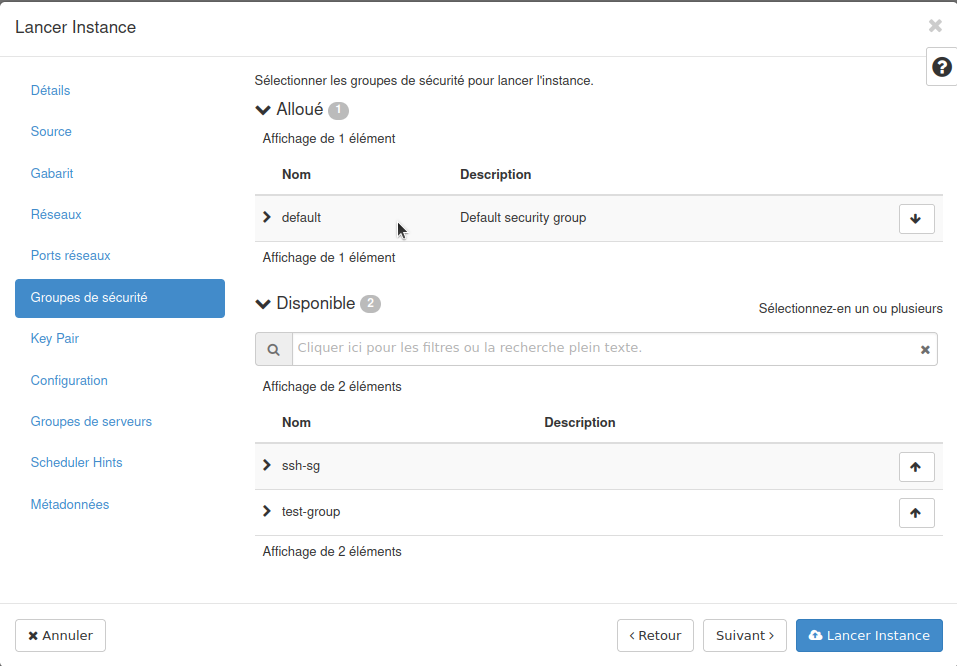
- In the Security groups tab
- The default security group default is normally already selected. If not, select it.
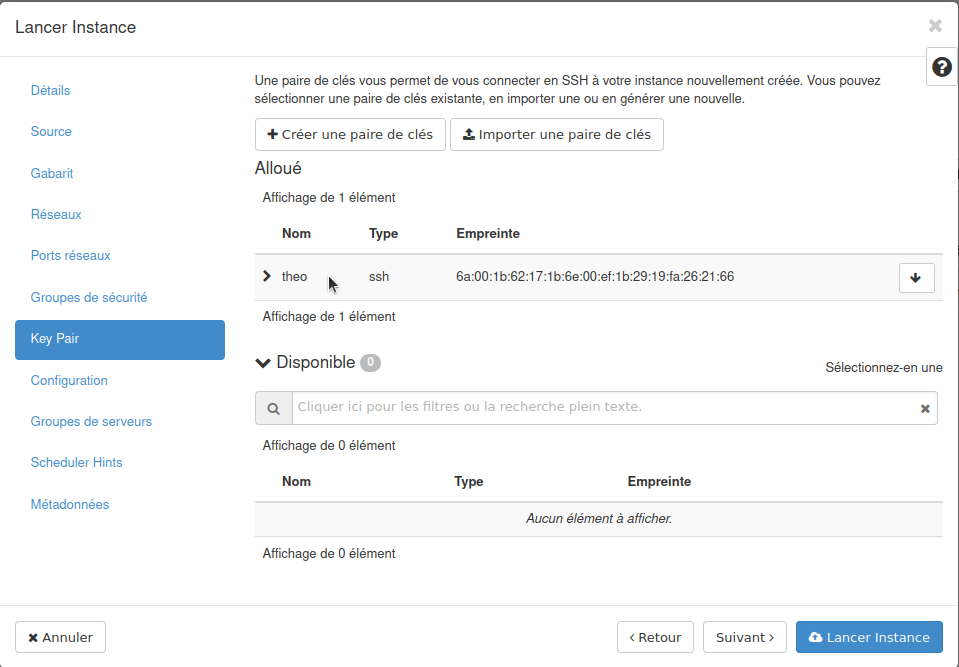
- In the Key Pair tab
- You’ll find the key pair we created at the start of this tutorial in the Create your key pair section, already selected. If not, select it.
VM creation is complete! We can now move on to the next step.
Making the VM externally accessible
For the moment, our VM has been created but is not accessible from our machine. To make it accessible, we’re going to allocate it a floating public IP address. Go to the left-hand tab Project > Network > Floating IP :
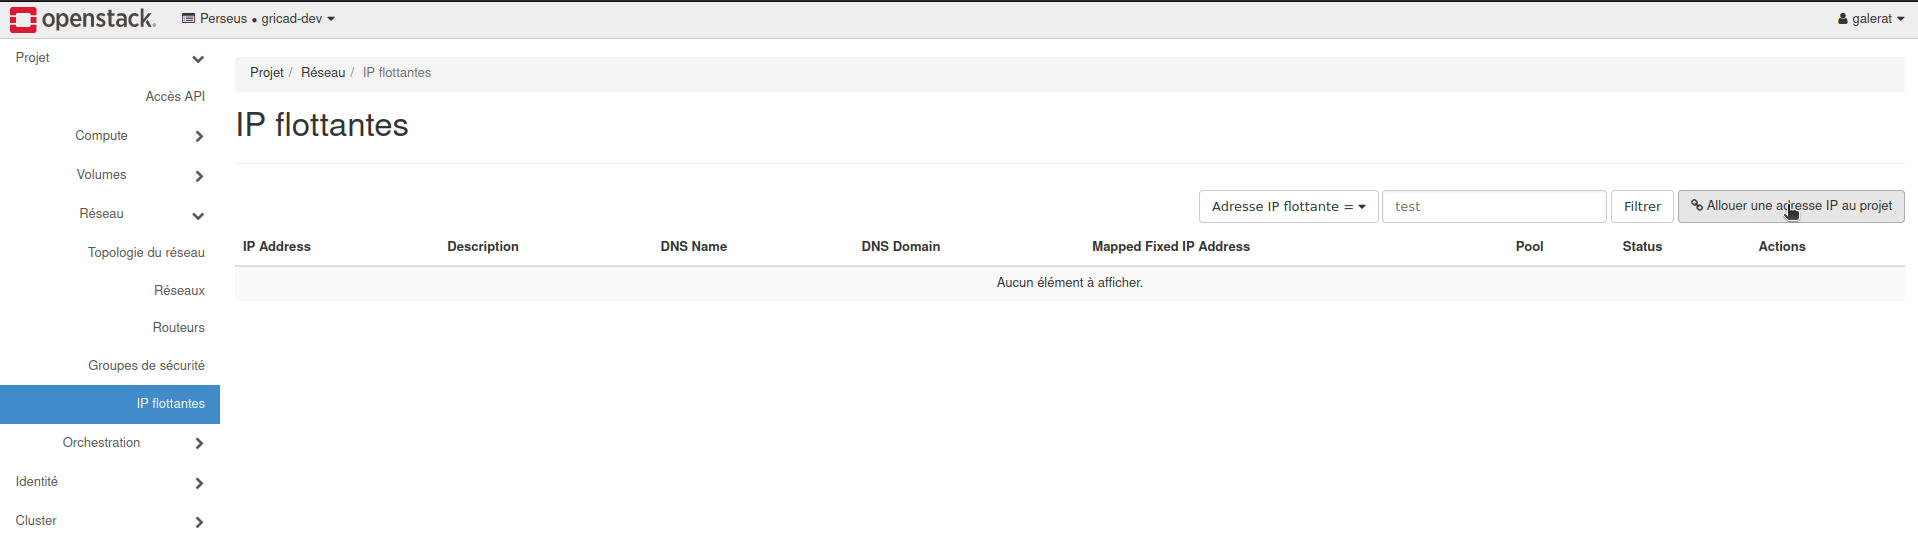
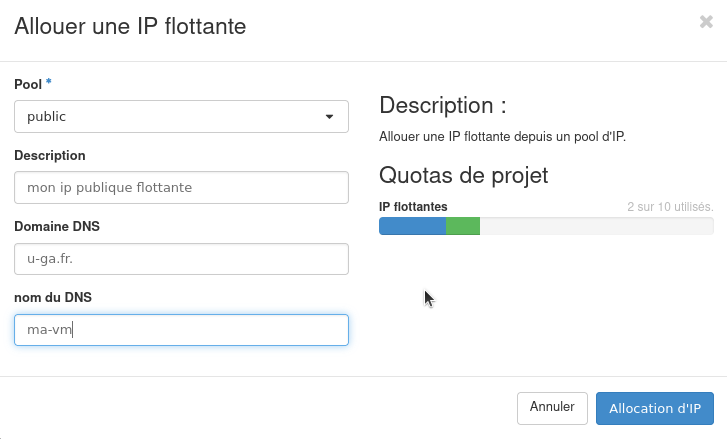
- We select public for the IP pool
- You can add a description to your IP address.
- Important: For the DNS domain name, only one list of names is allowed: nova.u-ga.fr., u-ga.fr. and univ-grenoble-alpes.fr.. Beware of the . at the end, it’s important.
- Choose a DNS name for your IP. This name will be concatenated with the previous domain name. In the end, for example, you’ll be able to access your VM with the name ma-vm.u-ga.fr.
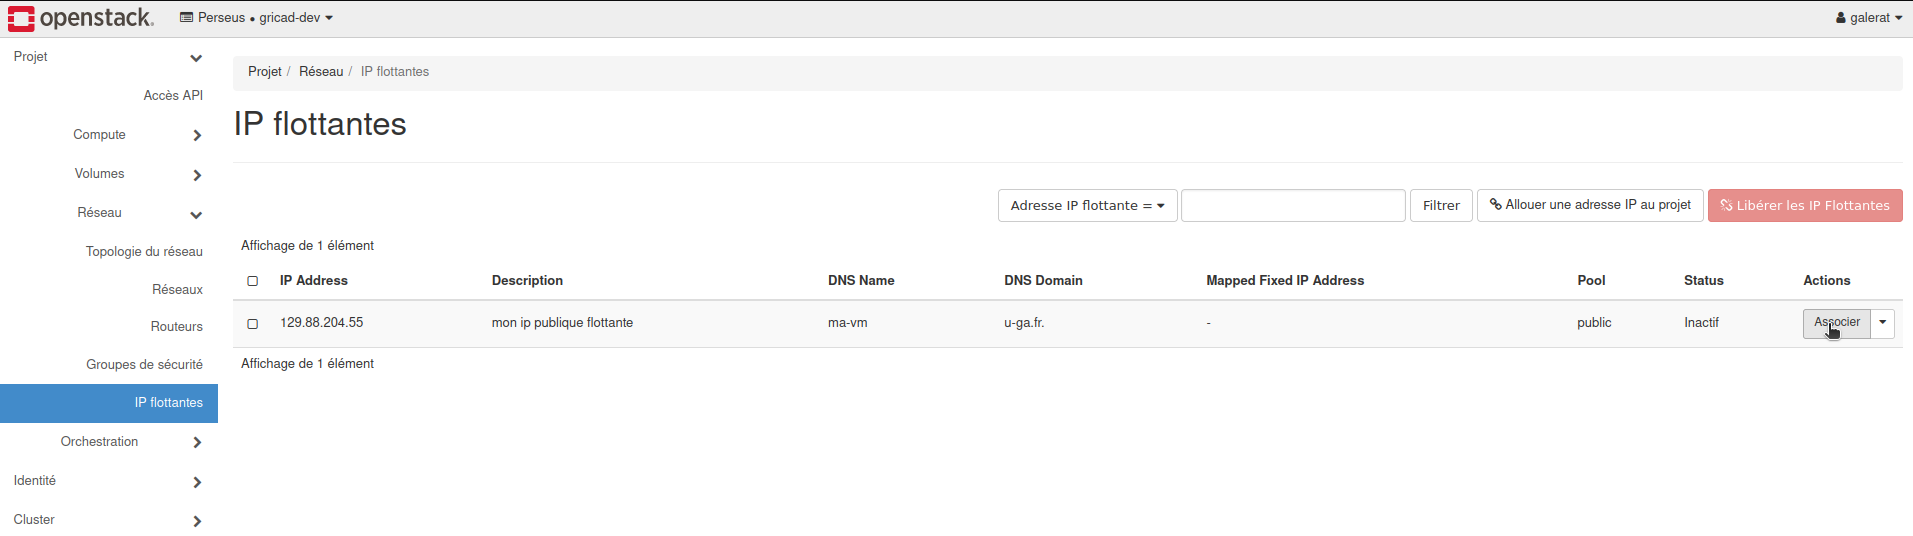
All that remains is to associate this IP with the VM created previously. To do this, click on Associate next to the newly created IP.
Warning: if you wish to retain your DNS declaration when deleting your VM, you must remember to dissociate your floating IP before deletion.
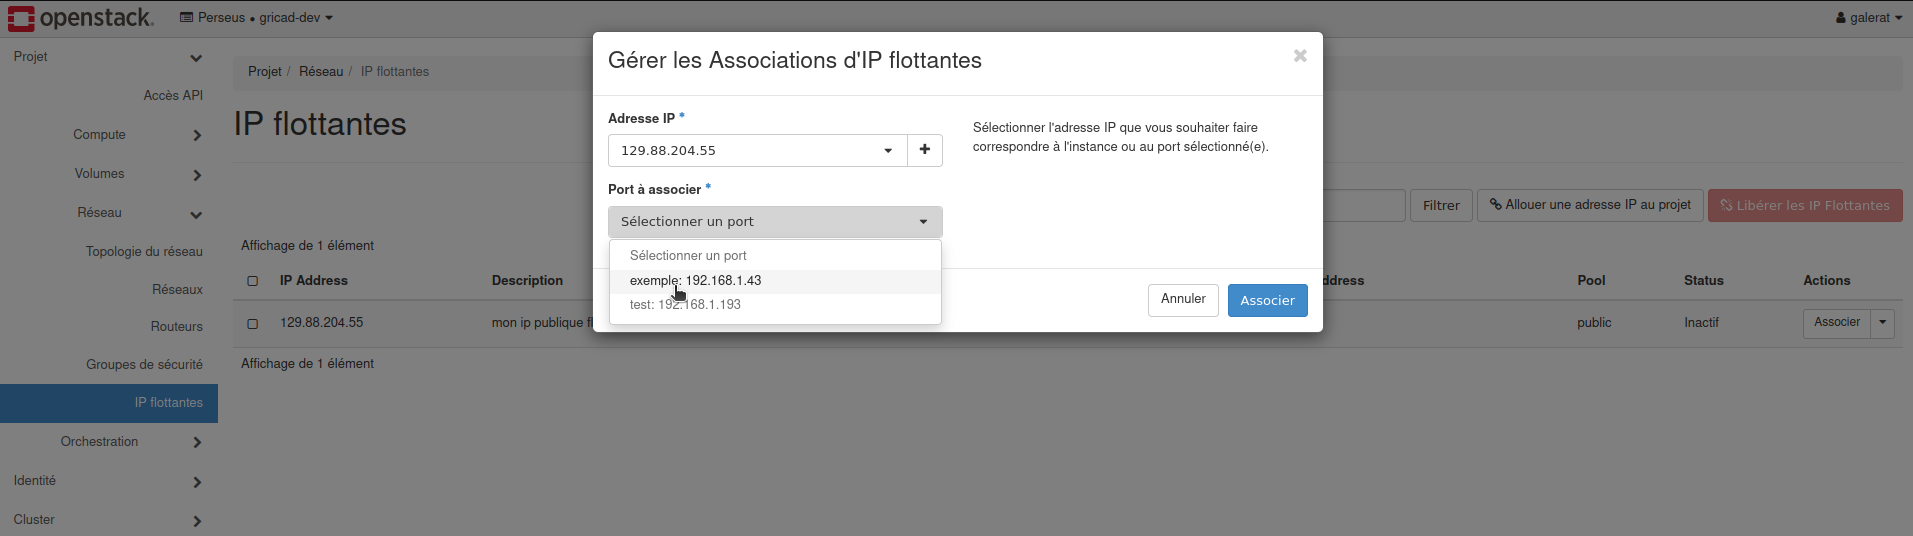
Finally, select your VM’s port, to be associated with your IP. In our example, the VM is called example and its private IP is 192.168.1.43.
That’s it! Our VM is accessible from our machine.
Test access to the VM
All that’s left to do is connect to the VM via SSH: Warning, the default user is ubuntu for an Ubuntu operating system, and debian for a Debian operating system. In addition, you need to be connected to the UGA network or VPN to connect to the instances.
user@user-gricad:~$ ssh debian@ma-vm.u-ga.fr
Note: You can also use the IP address directly instead of the DNS name.
user@user-gricad:~$ ssh debian@129.88.204.55
To make a service accessible outside the UGA network, you must contact a system and network administrator close to your organisation.
For a website (port 443), the request is simplified and can be made here: https://formulaires.univ-grenoble-alpes.fr/fr/declaration-site-web.
To go further
Warning, as a reminder, your VM can be accessed from any IP address, so it’s best to filter the authorized IPs. To do this, sees Groupes de sécurité.